
In the ever-evolving realm of electronics, choosing the right microcontroller for your project can be a make-or-break decision. The microcontroller serves as the brains behind your electronic creation, influencing its functionality, performance, and even its future scalability. So, how do you navigate this crucial choice effectively? In this comprehensive guide, we’ll walk you through the process of microcontroller selection, focusing on the criteria and steps that can lead you to select the best microcontroller for your project.
What Is A Microcontroller?

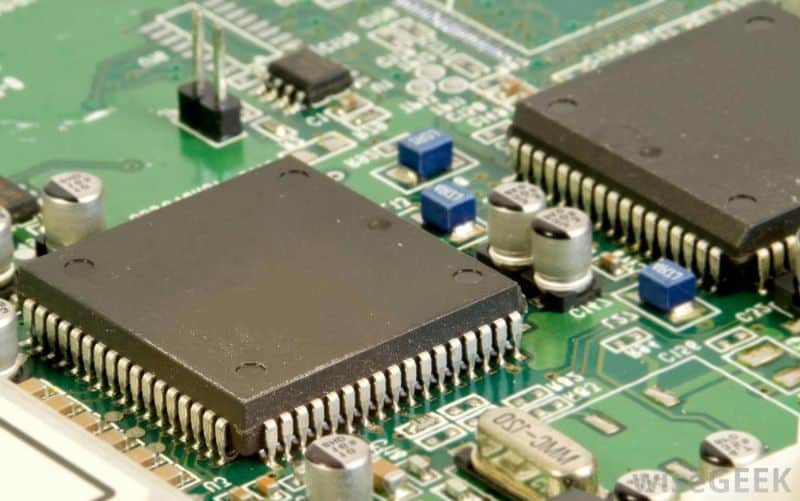
Let’s begin with the basics. What exactly is a microcontroller, and why is it so vital in the world of electronics? At its core, a microcontroller is a compact integrated circuit that acts as the central processing unit (CPU) of an electronic device. It’s responsible for executing the instructions that drive the device’s functionality. Microcontrollers are found in an astonishing array of electronic gadgets and systems, from your microwave oven to your smartphone, and from robotics to IoT devices.
Classification of Microcontrollers

Microcontrollers (MCUs) are classified into different categories based on their architecture, bit width, and instruction set. Understanding these classifications is essential for choosing the most suitable MCU for your specific application. Here’s a breakdown of the common classifications:
Based on Architecture:
- ARM-based Microcontrollers: ARM (Advanced RISC Machine) is a popular architecture used in a wide range of microcontrollers. ARM-based MCUs are renowned for their energy efficiency, high performance, and extensive ecosystem of development tools and software. They are available in different bit widths, including 32-bit and 64-bit variants. ARM-based MCUs are widely used in smartphones, IoT devices, automotive systems, and various embedded applications.
- AVR Microcontrollers: AVR is another widely recognized architecture known for its simplicity and ease of use. AVR MCUs, including those by Atmel (now Microchip Technology), are popular among hobbyists and beginners due to their straightforward development environment. They are often used in applications like robotics, home automation, and prototyping.
- PIC Microcontrollers: PIC (Peripheral Interface Controller) microcontrollers, developed by Microchip Technology, are known for their reliability and robust performance. They find extensive use in industrial control systems, medical devices, and automotive applications. PIC MCUs are available in various bit widths, offering flexibility to suit different project requirements.
- Other Architectures: Beyond ARM, AVR, and PIC, there are microcontrollers based on various other architectures like MIPS, PowerPC, and more. These may cater to specific niche applications or industries, and the choice depends on project-specific needs.
Based on Bit Width:
- 8-Bit Microcontrollers: 8-bit MCUs have an 8-bit data bus and are suitable for simple applications with low processing and memory requirements. They are commonly used in projects like basic control systems, small-scale IoT devices, and simple consumer electronics.
- 16-Bit Microcontrollers: 16-bit MCUs feature a 16-bit data bus, offering increased processing power and memory compared to 8-bit counterparts. They strike a balance between cost and performance, making them suitable for applications ranging from industrial control to medical devices.
- 32-Bit Microcontrollers: With a 32-bit data bus, these MCUs provide significant processing power and ample memory capacity. They excel in complex applications like high-performance robotics, advanced consumer electronics, and real-time control systems.
- 64-Bit Microcontrollers: Although less common in the microcontroller space, 64-bit MCUs offer substantial computational capabilities. They may find applications in specialized projects that require extensive processing power and memory.
Based on Instruction Set:
- RISC (Reduced Instruction Set Computer) Microcontrollers: RISC-based MCUs are known for their simplicity and efficiency. They execute a smaller set of instructions at a faster rate, making them suitable for applications where performance and power efficiency are critical.
- CISC (Complex Instruction Set Computer) Microcontrollers: CISC-based MCUs, in contrast, execute complex instructions that can perform multiple operations in a single instruction. This architecture is beneficial for applications where code compactness is essential.
Specialized Microcontrollers
In some cases, projects require specialized microcontrollers tailored to unique tasks. These include Digital Signal Processors (DSPs), ideal for audio processing; Field-Programmable Gate Arrays (FPGAs), designed for custom logic; and Microcontrollers with Digital Signal Controller (DSC) capabilities, optimized for tasks like motor control. Specialized microcontrollers excel in their designated applications, offering optimized performance and features. However, their specialized nature limits their versatility for general-purpose projects.
Microcontroller Families
Microcontroller families consist of groups of MCUs from the same manufacturer that share common characteristics and often software compatibility. Various microcontroller families cater to specific markets and industries. For example, The MSP430 microcontrollers by Texas Instruments are known for their low power consumption, making them suitable for battery-powered and energy-efficient applications.The PIC family by Microchip is versatile for diverse embedded applications, while the STM32 family by STMicroelectronics excels in IoT and real-time applications.The ESP32 microcontrollers by Espressif Systems are widely used in IoT applications due to their integrated Wi-Fi and Bluetooth capabilities. Above MCUs architecture fall under the RISC category.Choosing a microcontroller within a well-supported family can simplify development and troubleshooting. However, the specific MCU within a family may not perfectly fit all project requirements.
Factors To Look For While Choosing a Microcontroller
Selecting the right microcontroller for your project involves a careful evaluation of several critical factors. These factors serve as the criteria for choosing a microcontroller that will best meet the unique demands of your project. Here, we delve into each of these factors to provide you with a comprehensive understanding of their importance in the decision-making process:
Application:
Your project’s specific application is the compass that guides your microcontroller selection journey. Different applications require distinct sets of features and capabilities. Whether your project involves an Internet of Things (IoT) device, robotics, home automation, or another field, identifying the exact requirements of your application is the starting point.
Microcontroller Architecture:
Microcontrollers come in various architectures, such as Harvard or von Neumann. The architecture dictates how data is processed and instructions are executed. It’s essential to consider which architecture aligns better with your project’s needs, as this choice can impact how efficiently your code runs.
Bit Size:
The bit size of a microcontroller is a fundamental aspect that influences its processing power and memory capacity. Common options include 8-bit, 16-bit, and 32-bit microcontrollers. Choosing the right bit size depends on your project’s complexity and computational requirements.
Networking For Communication:
If your project requires communication capabilities, such as Wi-Fi, Bluetooth, Ethernet, or other protocols, you must ensure that the selected microcontroller supports the necessary networking options. Connectivity plays a vital role in many modern applications.
Operating Voltage:
Microcontrollers operate within specific voltage ranges. It’s crucial to select a microcontroller that aligns with your project’s voltage requirements to ensure compatibility with other components and power sources.
Number of Input/Output Pins:
The number of available GPIO (General-Purpose Input/Output) pins on a microcontroller determines how you can connect and control external components. Evaluating your project’s connectivity needs to choose a microcontroller with an adequate number of pins.
Memory Needs:
Estimate the memory requirements for your project. This includes both program memory (Flash) and RAM. Inadequate memory can limit your project’s capabilities, leading to performance issues or restrictions in functionality.
Package Size:
The physical package size of a microcontroller can impact the space constraints of your project. Consider the available space in your design and choose a microcontroller with a package size that fits comfortably within those constraints.
Power Consumption:
Energy efficiency is crucial, especially for battery-operated projects or applications with strict power constraints. Select a microcontroller with power-saving features to prolong battery life and reduce energy consumption.
Supports For Microcontrollers:
Investigate the ecosystem surrounding the microcontroller. Availability of libraries, community support, and online resources can significantly ease development and troubleshooting. Choosing a microcontroller with a robust support system can save you time and effort during the project’s lifecycle.
10 Steps For Microcontroller Selection

Selecting the right microcontroller for your project involves a systematic approach. Follow these ten essential steps to navigate the intricate process of microcontroller selection effectively:
Step 1: Make a list of required hardware interfaces
Begin by listing the necessary hardware interfaces for your project. This could include sensors, displays, communication modules (such as Wi-Fi or Bluetooth), motor controllers, and other components. Identify the specific interfaces (e.g., I2C, SPI, UART) and the number of pins required for each. Having a clear list of interfaces helps you choose a microcontroller that can seamlessly integrate with your project’s hardware.
Step 2: Examine the software architecture
Consider the software aspect of your project. Examine the software architecture, programming languages, and frameworks you plan to use. Ensure that the selected microcontroller supports your preferred development environment and software tools. Compatibility with your chosen software stack is essential to streamline development.
Step 3: Select the architecture
Based on your project’s requirements and software considerations, decide on the microcontroller’s architecture. Will an 8-bit, 16-bit, or 32-bit microcontroller be the best fit? The architecture choice influences the microcontroller’s processing power, memory capacity, and compatibility with software libraries.
Step 4: Identify Memory Needs
Determine the memory needs of your project. Estimate the program memory (Flash) and RAM requirements based on the complexity of your software. Be sure to account for the size of your code, data storage, and any additional libraries or resources your project may require. Ensure that the selected microcontroller offers sufficient memory to accommodate these needs.
Step 5: Start searching for microcontrollers
With a clear understanding of your project’s hardware and software requirements, begin your search for microcontrollers that match your criteria. Explore the offerings from various manufacturers and consider both well-established brands and newer options that may align better with your project’s specific needs.
Step 6: Examine Costs and Power Constraints
Compare the costs associated with different microcontrollers. Consider both the upfront hardware costs and long-term operational expenses, such as power consumption. Evaluate power consumption carefully, especially if your project is battery-operated or has strict power constraints. An energy-efficient microcontroller can extend battery life and reduce overall operating costs.
Step 7: Check part availability
Check the availability of the selected microcontroller and its components. Ensure that the microcontroller you choose is readily available from suppliers. Part availability is crucial to avoid delays in your project due to shortages or discontinuations, especially if you plan to manufacture your project in larger quantities.
Step 8: Select a development kit
Consider using a development kit or evaluation board for your chosen microcontroller. These kits often include essential tools, components, and documentation that simplify the development process. They provide a quick and convenient way to get started with the microcontroller and can save you time and effort in the initial stages of your project.
Step 9: Investigate compilers and tools
Research the compilers, integrated development environments (IDEs), and other software tools available for your chosen microcontroller. Ensure that these tools are compatible with your preferred development environment. Choosing a microcontroller with robust toolchain support can enhance your development experience and productivity.
Step 10: Start Experimenting
Once you’ve chosen a microcontroller that aligns with your project’s requirements, start experimenting with it. Develop a small-scale prototype or test the microcontroller’s capabilities in a controlled environment. This experimentation phase allows you to gain hands-on experience and ensures that the microcontroller meets your project’s needs effectively.
Conclusion
In the world of electronics, where innovation and creativity thrive, the choice of a microcontroller can determine the success of your project. As you navigate the intricate process of microcontroller selection, remember that the criteria for choosing a microcontroller are your guiding stars. These criteria encompass your project’s application, the microcontroller’s architecture, bit size, networking capabilities, operating voltage, GPIO pins, memory needs, package size, power consumption, and the robustness of its support ecosystem.
Choosing the right microcontroller requires a balanced consideration of these criteria to ensure a seamless alignment with your project’s unique demands. But it doesn’t stop there. We’ve also outlined a ten-step roadmap that will take you from the inception of your project idea to a well-informed microcontroller selection.
As you embark on your microcontroller selection journey, remember that the process may involve some trial and error. Experimentation and exploration are key. Test your chosen microcontroller’s capabilities, push its boundaries, and don’t hesitate to iterate on your choices as you gain more insights.
In the end, the ability to select the best microcontroller for your project is not just a skill; it’s a creative journey that empowers you to bring your electronic dreams to life.